Have you just started running or begun a new daily sport? If so you may find the universal lacing technique for your runners is not providing you with sufficient benefits. Or maybe no matter what the style, brand or fit of your runners, they are still causing you some pain and discomfort.
This pain and discomfort may be happening as your heels are slipping out of your shoes or you are getting black and painful toenails after completing a long run. It may also be that you have high arches or your forefoot is too wide. If you can relate to any of these scenarios or issues then look no further than the following five simple lacing techniques. Each of these different techniques may help to provide you with a more comfortable run and could possibly change the way you go about any future physical exercise.
Though firstly, it is important when assessing your feet, that you address the areas that result in the most amount of pain and discomfort while running. This will help ensure which of the following is the more appropriate lacing technique for you.
1.High Arches
As an individual with high arches, you will need to make sure that the middle of the shoes is opened up while following these simple steps:
a. Start lacing your shoes as you normal
b. Cross the laces into the second eyelet.
c. Take the laces upwards but make sure that you do not cross the tongue of the shoe into the third eyelet.
d. Leaving the middle section free, you can continue to lace yours shoes as normal.
2.Heel Slipping
a. Start lacing your shoes normally until you reach the second last eyelet. Then lace straight upwards into the last eyelet, leaving a loop on each side.
b. Once you have completed the lacing, pull the ends of the laces to ensure the shoe is secure around the foot.
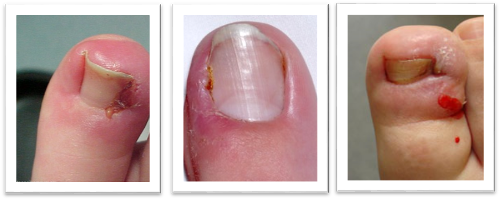
3. Black and painful toenails
a. Firstly, thread one side of the laces in a diagonal line from the big toe up towards the very last eyelet.
b. Use the remaining single lace to zig zag up the remaining shoe as you would normally.
c. Once you have finished lacing the shoe you will notice that it pulls the big toe away.
4. Wide forefoot
a. You will need to leave some space lower down the shoe to ensure your forefoot is not restricted.
b. Start by threading the laces evenly upwards until the third eyelet.
c. Once reaching the third eyelet, continue lacing normally upwards to the top.
5. Tight shoes
a. Take the first lace through the two eyelets on the same side as the big toe. Then use the lower lace to cross in around the bottom eyelet.
b. Then with the second lace you will want to skip the second eyelet on the same side and thread directly through the third eyelet.
c. Cross this same lace over the tongue and down the opposite side of the eyelet.
d. Continue this same pattern all the way up the shoe until you reach the final eyelet.
Now the next time you are about to embark on your next run, you will be able to implement a few of these techniques to ensure that you are pain free and have no discomfort for running or any other physical activity.
If you are wishing to get some advice on runners, or any foot related issues. Don’t hesitate to visit us at Medical Pedicure. Our friendly staff are waiting to take your call on 8645 9888. Alternatively you can book an appointment online here.
Image Credit
thecolorrun.com.au/running-shoe-lacing-techniques/